


YetaHost SSL Setup: A Definitive Guide to Let’s Encrypt SSL Activation on cPanel
Table of Contents
Securing your website is crucial, and with YetaHost, activating Let’s Encrypt SSL on cPanel is a breeze. Before diving in, let’s ensure that DNS propagation is complete. Utilize tools like https://www.whatsmydns.net/ to verify the status globally.
Now, let’s focus on the steps to fortify your site:
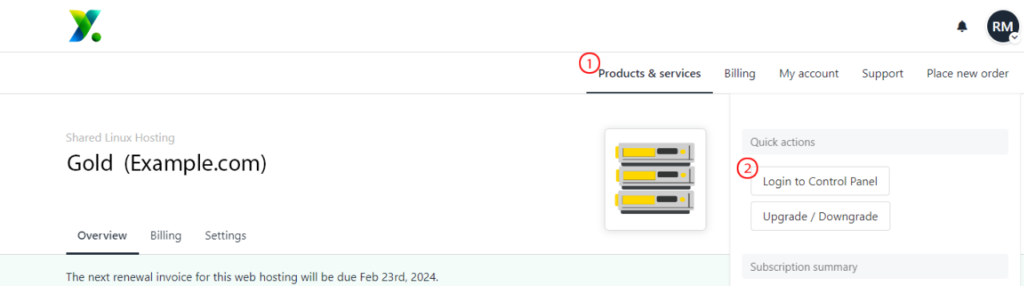
Step 1: Log in to cPanel
Access your cPanel account using your credentials. Navigate to your cPanel dashboard.
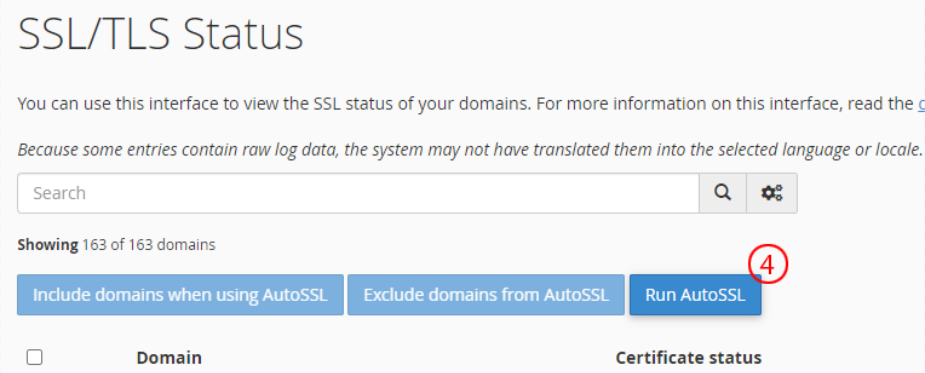
Step 2: Locate the SSL/TLS Status
In the cPanel dashboard, find the “SSL/TLS Status” icon. This is where you can manage your SSL certificates.

Step 3: Choose AutoSSL
Look for the option to enable AutoSSL. AutoSSL is a feature in cPanel that automatically installs and renews SSL certificates, including those from Let’s Encrypt.
Step 4: Enable AutoSSL
Click on the AutoSSL option and turn it on. This ensures that your website will be automatically secured with a Let’s Encrypt SSL certificate.
Step 5: Wait for Propagation
Before verifying the SSL status, it’s important to ensure that the changes have propagated across the internet. This process might take some time.
To check the propagation status, use a tool like https://www.whatsmydns.net/. Enter your domain name and select the type of DNS record you want to check (usually, it’s A or CNAME for SSL). This tool will show you the status of DNS propagation across various locations worldwide.

Step 6: Confirm SSL Activation
Once you’ve confirmed that the DNS propagation is complete, go back to the cPanel SSL/TLS Status section and verify that the Let’s Encrypt SSL certificate is active for your domain.
Step 7: Test Your SSL Connection
Visit your website by typing “https://yourdomain.com” in the browser address bar. Ensure that the padlock icon is displayed, indicating a secure connection.
Step 8: Monitor SSL Expiry
Let’s Encrypt certificates typically have a validity period of 90 days. Ensure that you monitor the SSL certificate’s expiry date and renew it in a timely manner to maintain continuous security.
By following these steps, you can activate a Let’s Encrypt SSL certificate on cPanel with YetaHost and ensure that your website is securely accessible over HTTPS. Always check the propagation status to confirm that the changes have taken effect across different DNS servers worldwide.